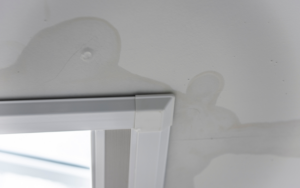
Properly maintained gutters are essential for protecting your home from water damage. When gutters are clogged, leaking, or sagging, rainwater can overflow and damage your roof, foundation, and landscaping.

A thorough gutter repair ensures that rainwater flows smoothly through the system and away from your home. In this guide, we’ll walk through the key steps to follow for a comprehensive gutter repair that will extend the life of your gutters and help prevent costly water damage.
1. Assess the Condition of Your Gutters
Before starting any repairs, it’s important to assess the condition of your gutters to determine the type and extent of damage.
Inspect for Damage
Begin by visually inspecting the entire gutter system. Look for any obvious signs of damage, such as cracks, holes, rust, or sections that have pulled away from the roofline. Also, note any sagging gutters or areas where water may have overflowed during the last rain.
Identify Blockages and Leaks
Check the gutters for blockages, especially at the joints and downspouts. Leaks can commonly occur at the seams or where different sections meet. Keep an eye out for any signs of moisture on the exterior walls or fascia boards, which could indicate gutter leaks or overflows.
2. Clean the Gutters Thoroughly
Once you’ve assessed the damage, the next step is to clean out any debris that could be causing blockages or contributing to leaks.
Remove Debris
Using a small trowel or gutter scoop, carefully remove leaves, twigs, and any accumulated dirt. Work along the entire length of the gutter, being cautious not to damage the gutter material as you go.
Flush with Water
After removing large debris, flush the gutters and downspouts with a garden hose to clear out smaller debris and ensure water flows smoothly through the system. Pay attention to any spots where water still pools, as this can indicate drainage issues or blockages deeper within the downspouts.
3. Repair Holes and Cracks
Damaged gutters can lead to water leakage, which can cause damage to your home. It’s crucial to fix any cracks or holes during your repair.
Patch Small Holes with Roofing Cement
For small holes or cracks in the gutter, apply roofing cement with a putty knife. Spread the cement evenly over the hole and smooth it out to ensure a watertight seal.
Use Gutter Patches for Larger Holes
If the holes are too large for roofing cement, use a metal or mesh gutter patch. Secure the patch over the hole using adhesive or screws, then apply a layer of roofing cement around the edges to seal it properly.
4. Seal the Joints and Seams
Leaks often occur at the joints between gutter sections, especially where the gutter meets the downspout or other connecting pieces.
Reinforce Loose Joints
Tighten any loose screws or rivets holding the joints together. If the joint has become too loose to secure, you may need to replace it or use additional fasteners.
Apply Silicone Caulking
Apply a high-quality, waterproof silicone caulk to all seams and joints, particularly in areas that show signs of leaking. Use the caulking gun to create a continuous bead along the joint and smooth it out with your finger for a tight seal.
5. Fix the Slope and Reattach Loose Gutters
For gutters to function properly, they need to have the correct slope so that water drains toward the downspouts.
Ensure Proper Gutter Slope
Check the slope of the gutters using a level. Ideally, gutters should have a slope of about ¼ inch for every 10 feet toward the downspout. If necessary, adjust the slope by bending the hangers or brackets slightly.
Secure Loose Gutters
If any sections of your gutter have pulled away from the fascia board, reattach them using new screws, hangers, or brackets. Make sure the gutter is securely fastened and won’t sag under the weight of heavy rainwater.
6. Repair or Replace Downspouts
Downspouts are crucial for directing water away from your home’s foundation. If they’re damaged or blocked, water can pool around the base of your home and cause structural issues.
Check for Downspout Clogs
Remove any debris from the downspouts by using a plumber’s snake or a hose to flush them out. Ensure water flows freely from the gutter through the downspout and away from your home.
Replace Damaged Sections
If any sections of the downspout are corroded, cracked, or otherwise damaged, it’s important to replace them. Use the same material as your existing gutter system to ensure a proper fit and function.
7. Test Your Repairs
Once you’ve completed all necessary repairs, it’s important to test the system to ensure everything is working correctly.
Check Water Flow
Use your garden hose to simulate rainfall by running water through the gutters. Ensure that the water flows smoothly from the gutter to the downspout without pooling, leaking, or overflowing. Pay close attention to repaired areas to confirm the fixes are holding.
Inspect After Rain
After the next rainfall, check your gutters to ensure they’re draining properly and that your repairs are holding up under real conditions. If you notice any new issues, address them promptly to avoid further damage.
Common Gutter Repair Mistakes to Avoid
Even with the best intentions, mistakes can happen during DIY gutter repairs. Avoid these common errors to ensure your gutters stay in good condition:
Using the Wrong Sealants or Patches
Not all sealants and patches are created equal. Make sure you’re using weather-resistant materials, such as silicone caulk or aluminum patches, to ensure your repairs last through various weather conditions.
Ignoring the Slope
One of the most critical aspects of gutter function is proper slope. If you neglect to adjust the slope, water may pool in your gutters, leading to sagging, overflow, and eventual damage to the gutter system and your home.
When to Call a Professional
While many gutter repairs can be handled by homeowners, there are situations where professional help may be necessary.
Major Structural Damage
If you notice major structural damage to your gutter system, such as multiple large holes, extensive rust, or severely misaligned sections, it’s best to call a professional. They’ll have the tools and expertise to replace damaged sections and restore proper function to your gutters.
Persistent Clogging Issues
If your gutters frequently become clogged despite regular cleaning, a professional can assess whether modifications such as larger downspouts, gutter guards, or additional drainage options are necessary to resolve the issue.
Conclusion
Maintaining and repairing your gutters is crucial for protecting your home from water damage and ensuring your gutter system functions efficiently. By following these seven essential steps for a thorough gutter repair, you can restore your gutters to top condition and avoid costly damage to your roof, foundation, and landscape. Regular maintenance and prompt repairs will help extend the life of your gutters, keeping your home safe and dry for years to come.
FAQs
It’s recommended to inspect your gutters twice a year—once in the spring and once in the fall. You should repair any issues, such as leaks, sagging, or blockages, as soon as they arise to prevent water damage to your home.
Many minor gutter repairs, such as sealing small leaks or reattaching loose sections, can be done yourself with basic tools. However, for major damage, such as large holes, significant sagging, or improperly installed gutters, it’s best to hire a professional to ensure the job is done correctly.
For basic gutter repairs, you will need a ladder, gutter scoop or trowel, hose, putty knife, sealant (silicone caulking or roofing cement), metal patches for larger holes, and screws or rivets to secure loose sections. If you're fixing the slope, a level may also be necessary.
A high-quality silicone caulk or roofing cement is ideal for sealing small leaks or cracks in gutters. Both materials are weather-resistant and provide a strong, watertight seal.
Gutters often sag or pull away due to the weight of debris or standing water, especially if the gutter slope is incorrect. Loose or damaged hangers, brackets, or screws can also contribute to gutters pulling away from the fascia board.


